Hi All! I know we are extremely late announcing this winner, apologies for that, but as they say, better late than never!
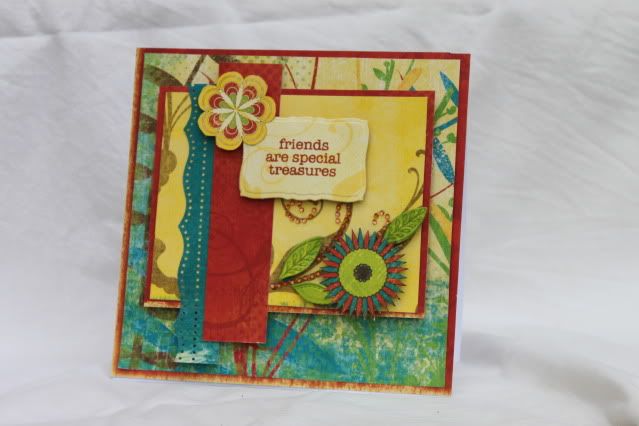
With only one card entry this time picking a winner certainly was easy!! Well done Tereesa, please contact Leisa or Kerri at the shop to organise collection of your lovely Bo-Bunny prize pack.
We will be taking a break from challenges for a little while. As you can all appreciate we are getting to that "time of the year" where all hell breaks loose, well, time gets away with way too many things to do and so little time! We will however try to keep everyone up to date with product in store and any other exciting tid bits as they happen.
Till next time!
Katie
Monday, November 15, 2010
Monday, November 8, 2010
We have heaps of Cricut Cartridges on Special - starting from $49.00!!
Here is a list of available cartridges:-
Disney/Pixar Cars
My World
Hello Kitty Font
Sentimentals
Serenade
Robotz
Superman
Ashlyn's Alphabet
A Child's Year
Stamping
Joys of the Season
Doodlecharms
Winter Woodland
Heritage
Winter Frolic
Simply Sweet
Christmas Cheer
Forever Young
Christmas Village - New!!
Beyond Birthdays
My Community
Stretch Your Imagination
Pagoda
Christmas Cards - New!!
Life's A Beach
From The Kitchen
Going Places
Graphically Speaking
Locker Talk
Paisley
Sweet Heart
Calligraphy
Country Life
Home Decor
Trim the Tree - New!!
Dinosaur Tracks
Paper Doll Dress Ups
Some stock is now available, more stock arriving daily, so we are taking pre-orders now!!
Other cartridges available from $59.00 - please contact us for what is in stock.
Please email us at info@scrapbookcity.com.au, phone us on 07 3378 7257 or fax us on 07 3378 7657. We are currently experiencing technical problems with our internet site, it is currently being worked on at the moment.
Please note - flat rate postage does not apply, we will charge actual postage using Australia Post rates.
Wednesday, October 27, 2010
More Cricut inspiration!
Hi - hope everyone is having a fabulous week!
Now as I promised, here are the photos of some canvases that my sister Leisa and I did for our two nieces for Christmas last year - I have to confess that I was really just the technical advisor on this project as this was Leisa's first time using the Cricut (can you believe it?)!
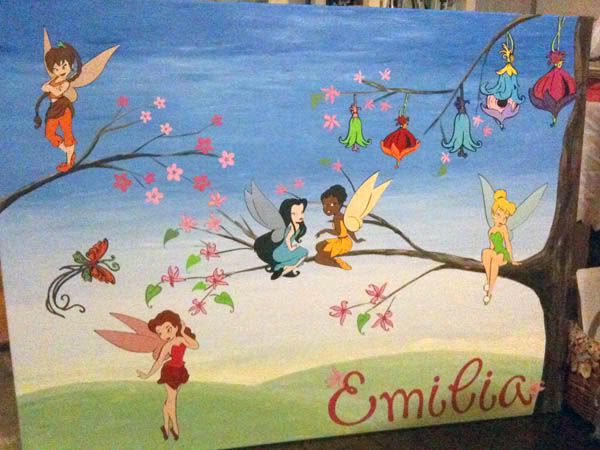
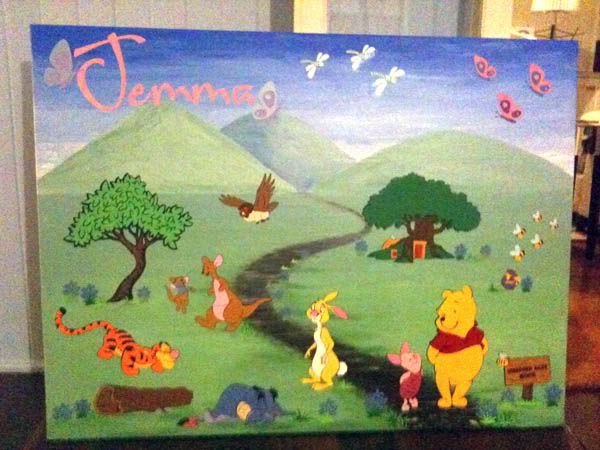
Once again, please excuse my terrible photography - but the only photos that I have were taken with my iphone in very bad lighting.
They were done using the Winnie the Pooh and Tinkerbell and Friends cartridges.
Leisa painted in the background and then cut out all the images with all the layers, stuck them down and varnished over them! I think they were about 1.2 metres in width.
We've done quite a few canvases in a similar way - we've also done one using the Happily Ever After Cartridge - it was of Cinderella dancing with the prince - the little girl that received this one had a Disney Princess themed room and was just thrilled. We've also done a few grown up versions as well - not quite as cute, but definitely as impressive!
I hope this gives you another glimpse as to what you can do with the Cricut and why it is my favourite toy - oops I mean tool!
Have a fantastic week!
LOL and blessings
Christina
Tuesday, October 26, 2010
Winner for Challenge #4
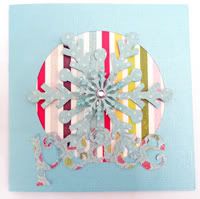
Time to announce the winner for challenge #4 on handmade flowers. We only had one entry for this challenge so lucky Chloe N has won that gorgeous pack of My Minds Eye papers! Contact Leisa or Kerri at the shop Chloe to organise collection.
Challenge #5
Morning all! Time for a new challenge already. My the time is flying by now! Have you got your Christmas cards done yet?? Personally, I won't even think about them until at least the middle of November!
So, given we are all stretched for time at this end of the year we thought an easy challenge was in order (but really, they all have been pretty easy, haven't they??!!). This challenge is a good old sketch challenge. Something we can all have a go at without having to think too long and hard. I like that kind of challenge!
As usual, link your entry with the link button below, you have two weeks, interpret the sketch how you feel (so long as we can see a vague notion of the sketch still remaining it counts!) and keep your fingers crossed that you might win one of the great prizes!
For this challenge we have two brand new releases from Bo Bunny as prizes. Crush and Crazy Love have just been released and they are just beautiful, so to get your hands on a set make sure you enter!
Better give you the sketch I suppose...... So here it is and an example to get you going!

 Card by Nicole
And here is a picture of the fantastic prizes (one for layout and one for card of course!).
 Crazy Love by Bo Bunny
 Crush by Bo Bunny
Till next time!
So, given we are all stretched for time at this end of the year we thought an easy challenge was in order (but really, they all have been pretty easy, haven't they??!!). This challenge is a good old sketch challenge. Something we can all have a go at without having to think too long and hard. I like that kind of challenge!
As usual, link your entry with the link button below, you have two weeks, interpret the sketch how you feel (so long as we can see a vague notion of the sketch still remaining it counts!) and keep your fingers crossed that you might win one of the great prizes!
For this challenge we have two brand new releases from Bo Bunny as prizes. Crush and Crazy Love have just been released and they are just beautiful, so to get your hands on a set make sure you enter!
Better give you the sketch I suppose...... So here it is and an example to get you going!
Card by NicoleAnd here is a picture of the fantastic prizes (one for layout and one for card of course!).
Crazy Love by Bo BunnyCrush by Bo BunnyTill next time!
Monday, October 25, 2010
Hi everyone, my name is Christina and I will be your blog host this week!
I hope you've had a chance to visit the store to view all the fabulous Christmas cards in the Showcase - I know there has been some teasing on the blog - but if not, I would suggest you rush in and see all the great designs!
This was my first year as part of the Showcase and I wanted to do something that showed what you can do with one of my favourite tools - my Cricut!!
Here are two of the cards that I made using the Echo Park Everybody loves Christmas range:
There were two things that I wanted to show with these cards 1. some thinking outside of the box - literally - trying a shape that wasn't a square or rectangle which is so easy with the fabulous range of Christmas cartridges available and 2. how easy layering is with the cricut and my new favourite toys - the cricut design studio and gypsy - resizing of your layers is just so easy and the fact that you can lay out your entire card on one cutting mat - just awesome! You can also overlay everything on the virtual mat to see that all your proportions are about right - such a timesaver - particularly if you are like me and will cut multiple pieces to get just the perfect size.
I am in love with all the new Christmas Cartridges - Christmas Cards, Winter Collection, Winter Woodlands (loving the font!) and my old favourite, Joys of the Season. Check them out in store now so that you have plenty of time to get all those cards made in time for Christmas!
Later in the week, I'm going to upload some photos of some fabulous canvases that we did for my two nieces' bedrooms using the Winnie the Pooh and Tinkerbell cartridges - I think you will be impressed (even if I do say so myself)!
Have a fabulous week!
LOL Christina
Wednesday, October 20, 2010
from one Christmas tree, to . . .
I have always dreamt of experiencing a white Christmas with the snow on the ground and the hills, so I decided to see what I could do with the Hero Arts Christmas Stamps to create a scene.
I started out with stamping the large tree on Copic friendly card with Memento Tuxedo Black ink


I started out with stamping the large tree on Copic friendly card with Memento Tuxedo Black ink

and then did the same with the smaller tree stamp. Then I turned to one of my favourite 'tools' . . . yes my Copics . . . and used a number of the green and earth family sketch markers to colour the trees


I purposely kept the colouring a bit 'rough' because I knew I was going to bling it up with Ranger Star Dust Distress stickles
then I made up a mask and stamped the trees on more copic friendly card before colouring as above

next I cut out another mask so I could ink the background. To do this, I made up some cloud and ground masks from scrap Bazzill Cardstock (you can also do this with post-it notes and plain paper, but I have the found the bazzill a bit stronger when using the Inkessentials Blending tool to blend the inks)

as you can see I tried out a couple of different 'blues' on a scrap piece of paper first. I used Tim Holtz Distress Inks Broken China, Bundled Sage and Antique Linen for the sky and the ground

To finish the card, I used some of my favourite designer paper at the moment - My Minds Eye Lost and found as well as the Best Creations Bling card (I embossed this strip with Cuttlebug dots)
Next, I roughed up the edges of the card used to stamp the background and stamped the Merry Christmas sentiment (from the same Hero Arts Christmas stamp pack as that for the trees). Next came dimensional dots on the front tree and then the same for the main tree image. Finally I used a white gel pen for the stars in the sky
Overall I was happy with the outcome but am already thinking about some minor things I would change next time.
Here is the finished product (with a close up as well)


Have some fun with stamps and masks and see what you come up with
till next time . . .

Subscribe to:
Posts (Atom)